MySQL Command for backup all databases:
mysqldump -uUSERNAME -pPASSWORD –all-databases > “D:/File_NAME_%date:~-4,4%-%date:~-10,2%-%date:~-7,2%-%time:~0,2%_%time:~3,2%_%time:~6,2%.sql”
Example:
Consider MySQL username = root and password = 123456
mysqldump -uroot -p123456 –all-databases > “D:/mysql_backup_%date:~-4,4%-%date:~-10,2%-%date:~-7,2%-%time:~0,2%_%time:~3,2%_%time:~6,2%.sql”
The result will be a file name (mysql_backup_2017-10-21-20_29_54.sql) containing all databases.
MySQL Command for one database databases:
mysqldump -uroot -p123456 –databases mydatabasename > “D:/mysql_backup_%date:~-4,4%-%date:~-10,2%-%date:~-7,2%-%time:~0,2%_%time:~3,2%_%time:~6,2%.sql”
We replaced –all-databases with –databases databasename
Note the date format:
- %date:~-4,4%: year 4 digits
- %date:~-10,2%: month 2 digits
- %date:~-7,2%: day 2 digits
- %time:~0,2%: time in 24 hours format
- %time:~3,2%: minutes 2 digits
- %time:~6,2%: seconds 2 digits
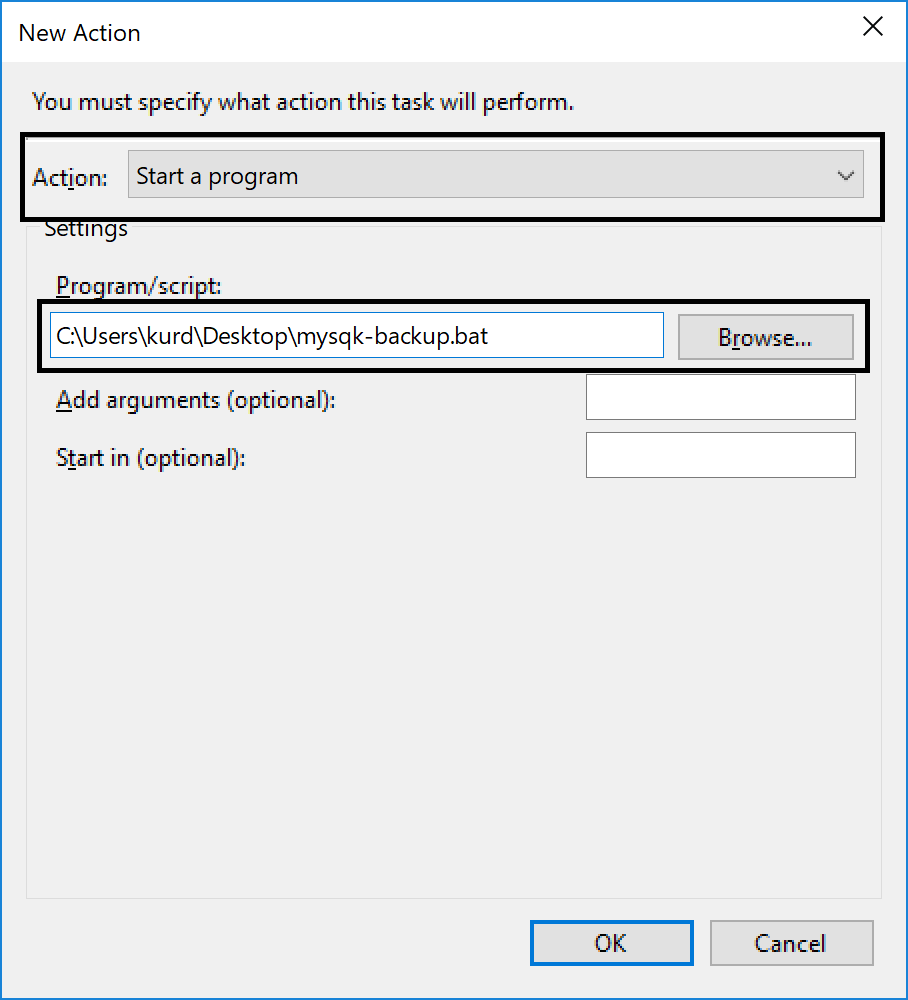
Now, after you customized the file name and date format, save your last command in file with (.bat) extension for examle:
mysqk-backup.bat
And put the file in local C: drive inside windows or any where in safe place of which normal user will not delete it, and then
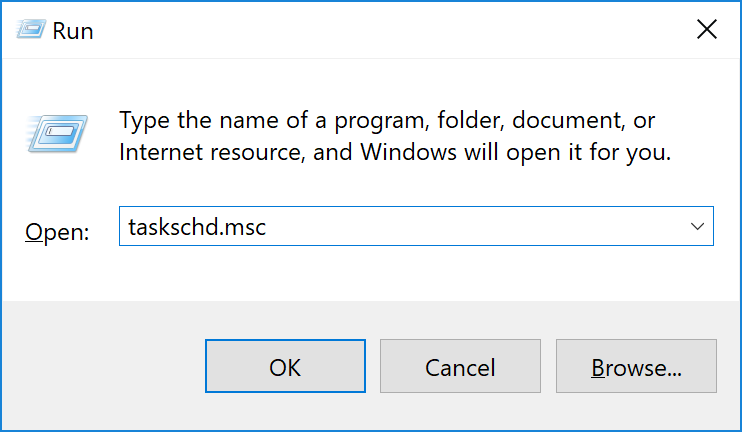
- Press windows key + R to open Run windows and then type taskschd.msc
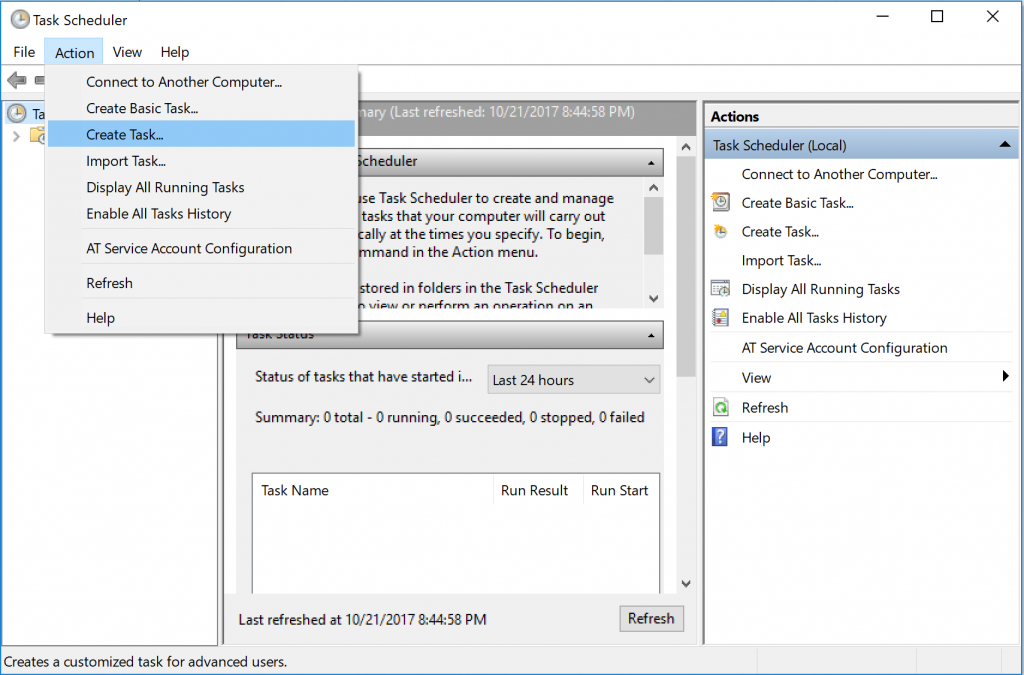
- Once the Task Scheduler opened, Create New Task (located at the right sidebar) or go to Action menu and then Create Task
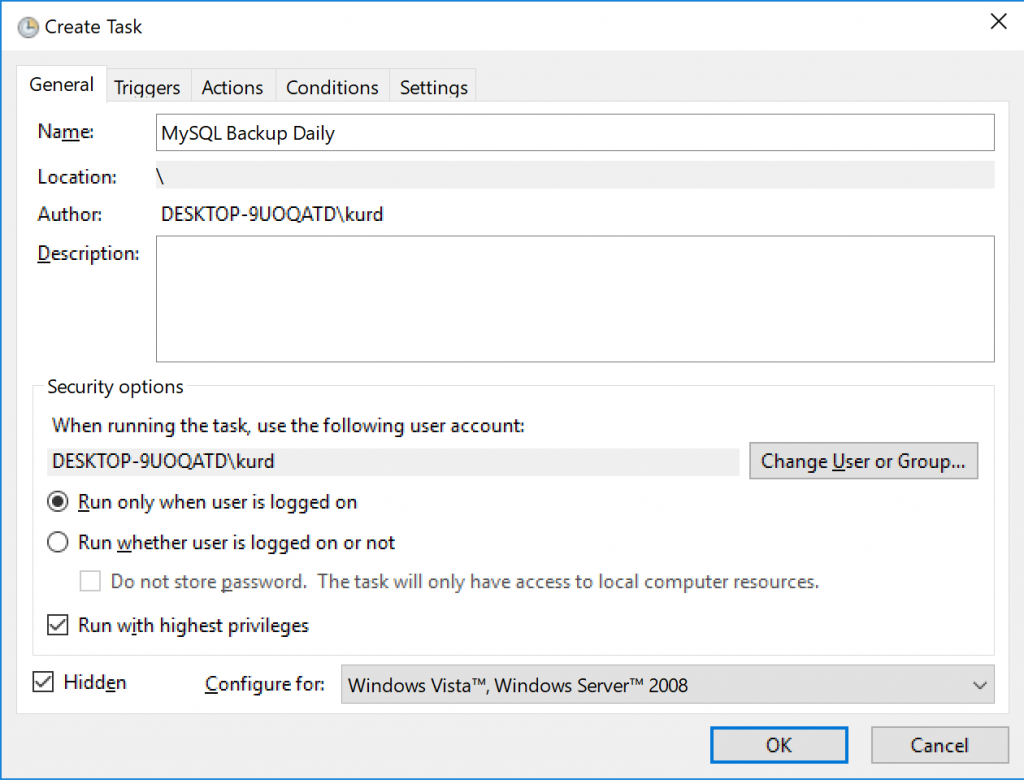
- The task creation menu will open, first in General Tab, Fill name of the task (MySQL Database Backup – Daily)
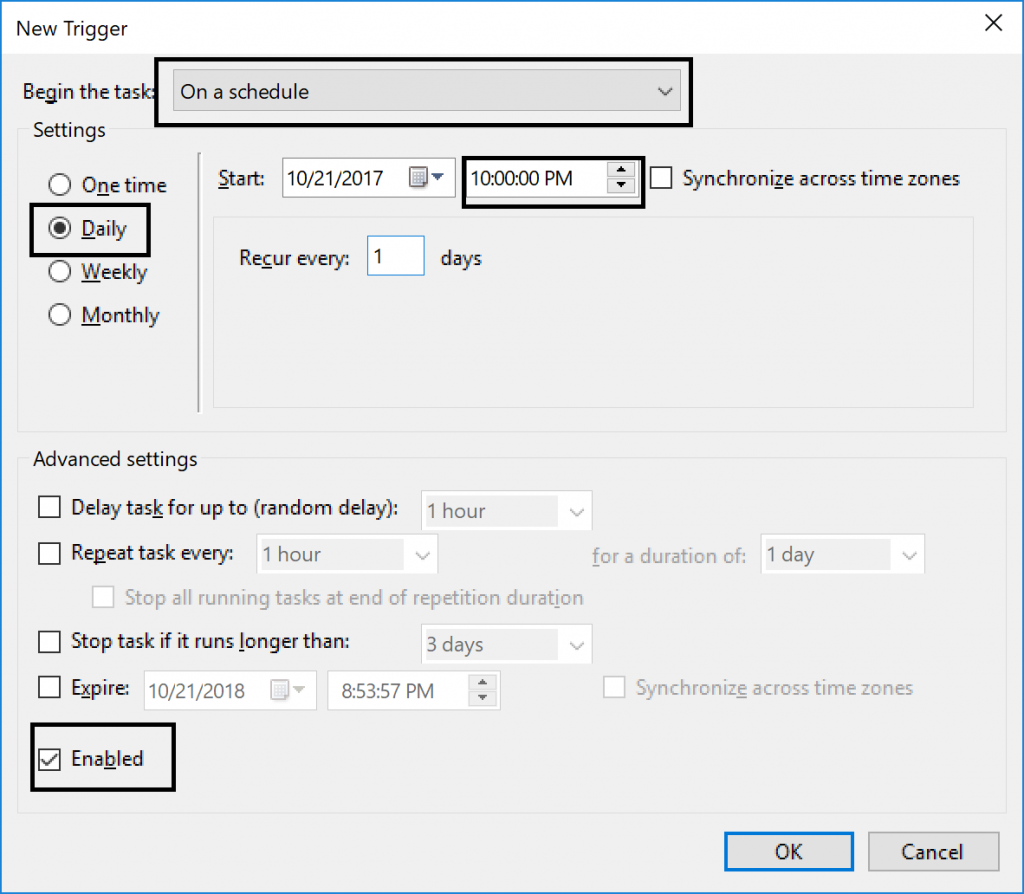
- Then Click on Triggers tab and Then New.. to create new trigger (This is where you set your schedule plan)
- Then Click Ok, and now go to Actions tab
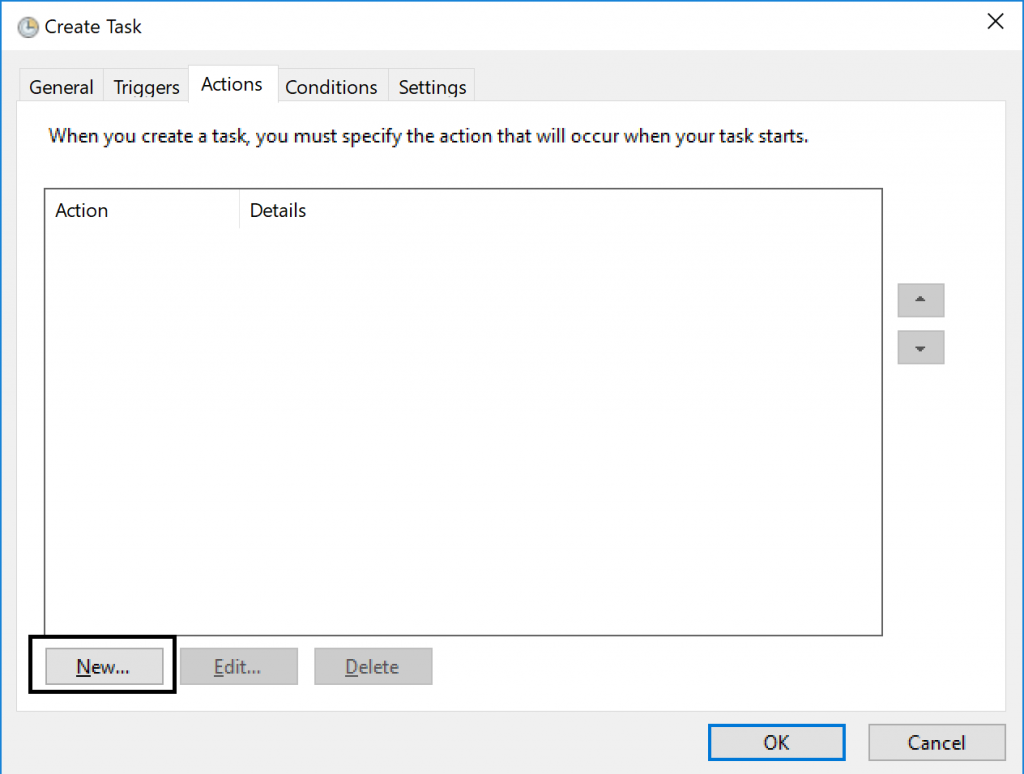
- Then Click on New.. once the window opened, browser to your file that we mentioned above, in our example we used (mysqk-backup.bat)
- Then click ok!, and again Click Ok to save everything.
- You can now right click on this task and click run to test if everything works fine.